|
8/9/2018 0 Comments Strategies for Supporting Reading Comprehension in Students with Learning Disabilities
Strategies for Supporting Reading Comprehension in Students with Learning Disabilities l Miss Rae's Room Special Education Teacher Blog
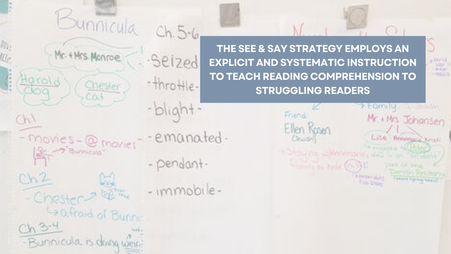
Are you searching for strategies to support reading comprehension in students with learning disabilities? Look no further! This blog provides valuable insights and practical techniques to enhance students' language comprehension skills, specifically focusing on my See & Say Strategy. From fostering visualization, verbalization, and vocabulary techniques to utilizing story mapping and read-alouds, this blog equips teachers with effective tools to empower students and improve their overall reading comprehension.
Picture it! A teacher stands before a student in a literacy-enriched classroom, surrounded by books and vibrant letters on the walls. The teacher eagerly asks the student to share their understanding of a recently read story. However, the student struggles to recall the details. Reading comprehension is the ultimate goal of reading, and for students to comprehend text, they must have strong language comprehension skills. In this blog, we will explore effective strategies to support reading comprehension in students with learning disabilities. Understanding the Importance of Language Comprehension:
Language comprehension forms the foundation of reading comprehension. To comprehend a text's meaning, students must have strong language comprehension skills, including vocabulary, background knowledge, working memory, inferencing, and attention. Proficient reading comprehension encompasses accurate and fluent word reading skills, syntactic knowledge, cohesive cues, comprehension monitoring, and knowledge of text structure.
Language comprehension requires -vocabulary, -background knowledge, -working memory, -inferencing, and -attention. Similarly, proficient reading comprehension of a text is influenced by the same language comprehension skills plus… -accurate and fluent word reading skills, -adequate syntactic knowledge, -knowledge of cohesive cues, -comprehension monitoring, and -knowledge of text structure (Cain and Oakhill, 2009). By addressing language comprehension, teachers can help students overcome reading comprehension challenges. Students who demonstrate proficient reading comprehension have the ability to… -understand words, -integrate the meaning of the words into a mental model of the text, and simultaneously, -attend to the text’s content, -shift their attention to what is important, -make text connections, -strive for coherence, and -use their background knowledge of the subject to facilitate comprehension (Perfetti, et al., 2013; Beck & McKeown, 2006). Reading comprehension is a process, not a product, that requires multiple processes to come together at once, to make meaning of written language.
And guess what? Sophia was onto something with her “picture it”.
Setting the scene helps your listeners visualize your words which improves comprehension, understanding of language, and memory of text! Students often struggle to recall what they have just read. And language comprehension is a contributing factor to this. Visualization:
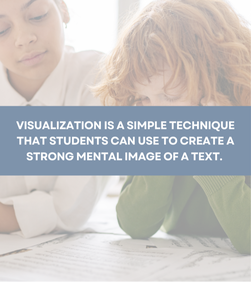
So one strategy we can use to support this is visualization. Visualization is a simple technique that you can use to create a strong mental image of a text. It refers to the ability to create mental pictures in our minds based on the text we read or words we hear. It is one of many skills that make reading comprehension possible.
Some students require explicit teaching to visualize. This is because when we visualize, we are tapping into our prior knowledge, making connections, gathering information and paying attention to detail.
What can we do for these students?
We can use my See & Say Strategy! Let me teach you the BEST strategy for teaching reading comprehension. This is a strategy that I initially designed for Special Education students, but is beneficial for ALL students because it teaches them a tool for understanding text! The Power of Visualization, Verbalization, and Vocabulary
See, Say, Semantics is a powerful strategy for teaching reading comprehension.
Mental imagery has “reliable effects on improving memory for text” (National Reading Panel, 2000, p. 4-42). This skill is naturally developing for most students. However, those diagnosed with a learning disability in reading often struggle to form pictures in their head for presented words. This is often due to the fact that their focus, during reading, is on decoding the words. If a reader has to spend most of his/her time decoding each word within a sentence, comprehension fails. This results in an inability to develop concept imagery impacts comprehension; thus, delaying the progression of reading for students. The See & Say Strategy:
And here’s what my See & Say Strategy looks like:
1-SEE - Begin by asking the students to see or visualize (imagine, picture) what they read in their heads as they read, stopping periodically to first, model what you are seeing (“I’m picturing her face looking angry. It’s red and her fists are clenched…”). 2-SAY - Ask the students what they are picturing. Stop after each part of the story (beginning, middle, end). At each stopping point, ask the students to say or verbalize the part (beg., mid., end) as they see it. Then, have them draw what they saw in their heads. 3-SEMANTICS - After reading the whole text, ask students to use their drawings to retell the story’s beginning, middle, and end. Lastly, write a sentence or two next to each picture in order to produce a complete retelling. Tip: For added support, give students sentence frames… i.e. In the beginning, ___. The text can be read round robin style of reading with a small group or as a mini-lesson with the whole class. 
Scaffold the approach by gradually releasing responsibility (i.e. allow the student to identify the beginning, middle and end, instead of explicitly stating it and determining it for students).
You can also use this approach with non-fiction. Vary the strategy by stopping after reading each section, and model what you see or visualized (i.e. “I pictured the frog in my head changing from an egg to a…”). Ask the students to say what they pictured. Then, have them draw what they visualized. After reading the whole text, ask students to use their drawings to retell the main idea and supporting details. Lastly, write a sentence or two next to each picture in order to produce a complete retelling. (Tip: For added support, give students sentence frames… i.e. Frogs change from ___.) Tip: I have my students complete retelling sheets after each book we read ...BUT... since paper is a hot commodity along with a teacher's time which can be saved from copying, I place my retelling sheets inside these pockets so I can have them for the ENTIRE school year... yes, you read that correctly! Grab this strategy HERE! AND get these compatible graphic organizers for retelling HERE! Or click HERE to get these graphic organizers to address non-fiction texts as well. While my students are amazing, they are like all students. We didn’t just jump right into these learning moments. Instead, I utilized some key tools to improve students’ reading comprehension. The first step was through Story Mapping. Utilizing Story Mapping:
Related Resources...
Here’s what Story Mapping looks like when following my See & Say Strategy:
1-SEE After reading a text, create a visual of what you read. Students should identify story elements such as characters, problems, setting, etc. Essentially, you are drawing what happened. To help your students with this skill, ask them questions. Where were the characters? What could they see? What were the characters doing? What were the characters saying? What is the problem of the story? What actions did the characters take toward solving the problem? Did the setting change? Was the problem solved? What is the lesson learned? (Insert a social emotional learning moment here!) Create a visual with these questions as a scaffolded support towards independence with the skill. 2-SAY Have students say or verbalize the answers to the questions you ask. Teachers should promote a class discussion of the events that occurred in the text. This promotes oral language development, not only social language, but also academic language is being developed as students learn how to discuss text. Verbalizing a text’s ideas also allows students to wrestle with the text! Any misunderstandings can be ironed out, while different perspectives can be debated. 3-SEMANTICS The oral discussion enables students to apply newly learned vocabulary connected to the text as well as practice oral discussion rules and the language of book discussions! My story maps include words and pictures. The words that I jot on our story maps are key vocabulary related to the text. The pictures tell the text’s story, while the words help to match ideas and images. Both tools go hand-in-hand to support understanding of the text. You can use a variety of graphic organizers to support this strategy or just wing it with your own on the fly mapping! Story mapping can be applied to the content areas too! After reading a non-fiction text, we re-read it, going line by line. We analyze what the sentences are saying by Visualizing and making connections between the ideas. We Verbalize these concepts through discussion. Simultaneously, we draw the ideas. Next, we do some Vocabbing, by jotting down keywords needed for comprehension. Another tool to support my See & Say Strategy is Visual Thinking. Enhancing Comprehension Through Visual Thinking:
Visual thinking is another powerful tool to enhance reading comprehension. By utilizing visual aids, such as images related to the text, students can engage in See, Say, and Semantics discussions. This technique promotes deeper understanding, vocabulary application, and oral language development.
Here’s what Visual Thinking looks like when following my See & Say Strategy: 1-SEE I will post an image on the front board related to the text we are reading. Students will come to the front and write around their images, their reactions, questions, things they noticed, etc. around the image. 2-SAY I then have them discuss the image in groups. If they have any new ideas, they can write it around the image. Lastly, we discuss the image. 3-SEMANTICS The writing around the image enables students to apply newly learned vocabulary in the context of the written language. It also gives struggling students a written support for the oral discussion of the image. The Role of Read-Alouds in See, Say, Semantics
Read-alouds play a crucial role in modeling language and fostering visualization, verbalization, and vocabulary skills. By selecting texts with explicit and lively language, teachers can guide students in forming mental images, engaging in oral discussions, and analyzing the author's use of language.
So how do I implement read alouds using my See & Say Strategy? 1-SEE Read the text aloud. Have your students form mental images. Ask them to close their eyes and picture the image that the author’s words are creating. 2-SAY Build oral language through discussion of these images. Make your visualizing real through modeling your visualizations of the text with visual representations. Draw quick pictures of what the words help you to imagine. 3-SEMANTICS Talk about specific words and sentences. How do these change what you are visualizing? What tools is the author using to help the reader visualize? Connecting Reading Comprehension to Writing:
Reading and writing are interconnected skills. By teaching students to write using language that creates vivid mental images, teachers can reinforce their reading comprehension abilities. Students can apply the See & Say Strategy to writing prompts, using language to visualize and verbalize their ideas. This integration allows students to transfer their comprehension skills to written expression.
THESE graphic organizers can help students tackle text-based prompts. Have your students use language that creates vivid mental images. Partner them up to visualize each others’ writing! Read a text about Paul Revere’s ride in Social Studies. What does the night look like? How are the people feeling? Ask questions! How do the author’s words and your background knowledge help you to visualize? How does the vocabulary support your learning and understanding? How does this tool help you comprehend a text better? Read a math picture book and follow the same procedure! So teach your students to pull a Sophia and “Picture it” with my See & Say Strategy! Enhancing reading comprehension in students with learning disabilities requires a multi-faceted approach that addresses language comprehension, visualization, verbalization, and vocabulary development. By implementing the See & Say Strategy, story mapping, visual thinking, and read-aloud techniques, teachers can empower students and promote a deeper understanding of text. Discover the power of these strategies and unlock the potential of every student in your classroom. Happy Teaching! Miss Rae
Resources:
Beck, I.L., & McKeown, M.G. (2006). Improving Comprehension with Questioning the Author: A Fresh and Expanded View of a Powerful Approach. Cain, K., & Oakhill, J. (2009). Reading comprehension development from 8 to 14 years: The contribution of component skills and processes. In R. K. Wagner, C. Schatschneider, & C. Phythian-Sence (Eds.), Beyond decoding: The behavioral and biological foundations of reading comprehension (pp. 143–175). The Guilford Press. National Reading Panel (2000). Teaching children to read: An evidence-based assessment of the scientific research literature on reading and its implications for reading instruction. NIH Publication No. 00-4754. Washington, DC: National Institute of Child Health and Human Development. Perfetti, Charles & Stafura, Joe. (2014). Word Knowledge in a Theory of Reading Comprehension. Scientific Studies of Reading. 18. 10.1080/10888438.2013.827687.
Related Blogs...
0 Comments
|

CategoriesAll Comprehension CoPlanning CoTeaching Directed Reading DIY Fluency Fountas & Pinnell Graphic Organizers Guided Reading Lesson Planning Multi-Tiered Systems Of Support Phonological Awareness RAN Read And Respond Reading Reading Comprehension Response To Intervention RTI Science Of Reading Science Of Reading For Special Education Teachers Special Education Eligibility Special Education Lesson Planning Teaching Strategy Visualizing & Verbalizing Visual Texts Vocabulary Writing Writing In Response To Reading |

 RSS Feed
Proudly powered by Weebly